As the winter chill settles in, there’s a certain magic in the air, particularly in the kitchen where comforting aromas embrace us like an old friend. Cooking during these colder months has its joys, and boiling eggs can turn into a delightful ritual rather than a chore. When it comes to perfecting the art of the jammy yolk, timing is indeed everything, and mastering this skill can elevate a simple breakfast or snack into something truly indulgent.
A Heartfelt Introduction to Jammy Yolks
Whether nestled atop a bowl of ramen, served alongside crispy toast, or even perched on a vibrant salad, the jammy yolk is truly a winner! Imagine cutting into a perfectly boiled egg, only to have that luscious, creamy yolk flow out gently. The contrast of a silky, slightly runny yolk encased in a tender white is nothing short of culinary poetry.
Why You Need to Master This Kitchen Hack 🥚
Let’s get straight to the point: boiling eggs to achieve a jammy yolk is a simple yet rewarding culinary skill. Consistency is key; a little practice, and anyone will find they can get it right every time. From breakfast burritos to salad toppings and beyond, jammy eggs can transform any dish into a gourmet experience. This article covers everything from choosing the right eggs to cooling methods that ensure that perfect texture.
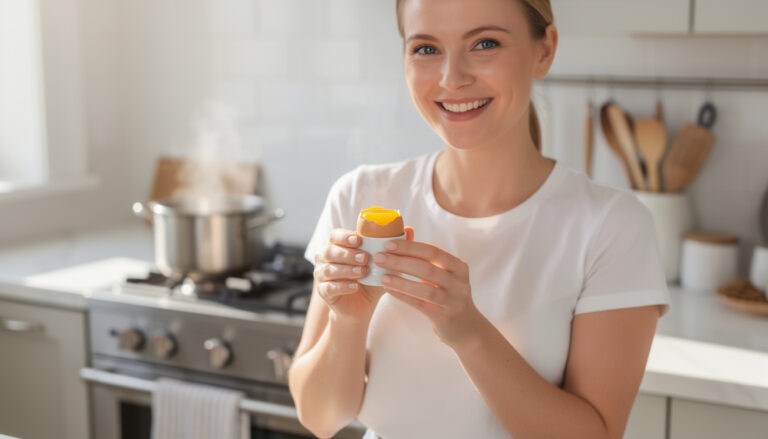
Navigating the Perfect Timing for Jammy Yolks
When it comes to egg cooking tips, one rule stands out: timing is everything. Depending on the size of the egg and your desired yolk consistency, the timing can change significantly.
- Runny yolk: 4-5 minutes for that soft-boiled result 🌊
- Jammy yolk: 6-8 minutes—just the right balance of slightly set and creamy! 🍳
- Firm yolk: 10-12 minutes for fully cooked eggs 🥖
Having the right kitchen equipment makes all the difference. Always opt for older eggs (about a week old) as fresh eggs can be a nightmare to peel. Plus, aiming for room temperature before they hit the boiling water will keep those fragile shells intact!
The secret ingredient that makes every pasta dish better
The Art of Egg Preparation: Step-by-Step 🥄
Embarking on this culinary journey is as thrilling as it is tasty! Let’s break down the process into manageable steps to ensure that perfect jammy yolk every time.
Step 1: Select Your Eggs
Choosing the right size eggs is crucial—large eggs tend to yield the best results. Place them in a single layer in your saucepan and cover with an inch of cold water. Toss in a smidgen of salt or a splash of vinegar to prevent any accidental cracking while cooking.
Step 2: Bringing it to a Boil
Set your stove to medium-high heat and watch as that water begins to bubble! Once it reaches a rolling boil, reduce the heat slightly to maintain a steady yet gentle boil. This keeps the eggs from clattering around and cracking.
Step 3: Timing the Boil
With the water boiling, it’s all about the timer! Set it for 6-8 minutes depending on your egg size and preference. Keep the pot covered as much as possible, and resist the temptation to peek too often! This keeps everything cooking evenly.
Cooling Down: The Essential Ice Bath ❄️
When the timer sings its sweet tune, it’s time for the crucial ice bath. Scoop those eggs out with a slotted spoon and immerse them in ice-cold water for at least 5 minutes. This halts the cooking process, preventing those yolks from overcooking. Plus, cooling them down makes peeling a breeze!
Addressing Common Mistakes 🛑
In this kitchen journey, it’s essential to avoid a couple of pitfalls. Overboiling is a common enemy and will lead to dense, unappetizing yolks. Stick to those timing guidelines religiously! Don’t peel too soon—patience really does pay off when it comes to egg cooking.
For those transporting the eggs or holding them for later, they can last in their shells for up to a week in the refrigerator. For peeled eggs, consume them within a couple of days for the best flavor and texture. Lovely!
A Call to Adventure: Try it Yourself! 🌟
Now that we’ve navigated the ins and outs of boiling eggs for that dreamy jammy yolk, it’s time for you to embark on your culinary journey! Give it a go, and see how these techniques flavor your meals and brighten your winter days.